Create your iPhone project
Make one home for the files that become your app.
Create a basic iPhone project and know where it is saved.
Let’s do this
- 1In Xcode
Start a new iPhone app
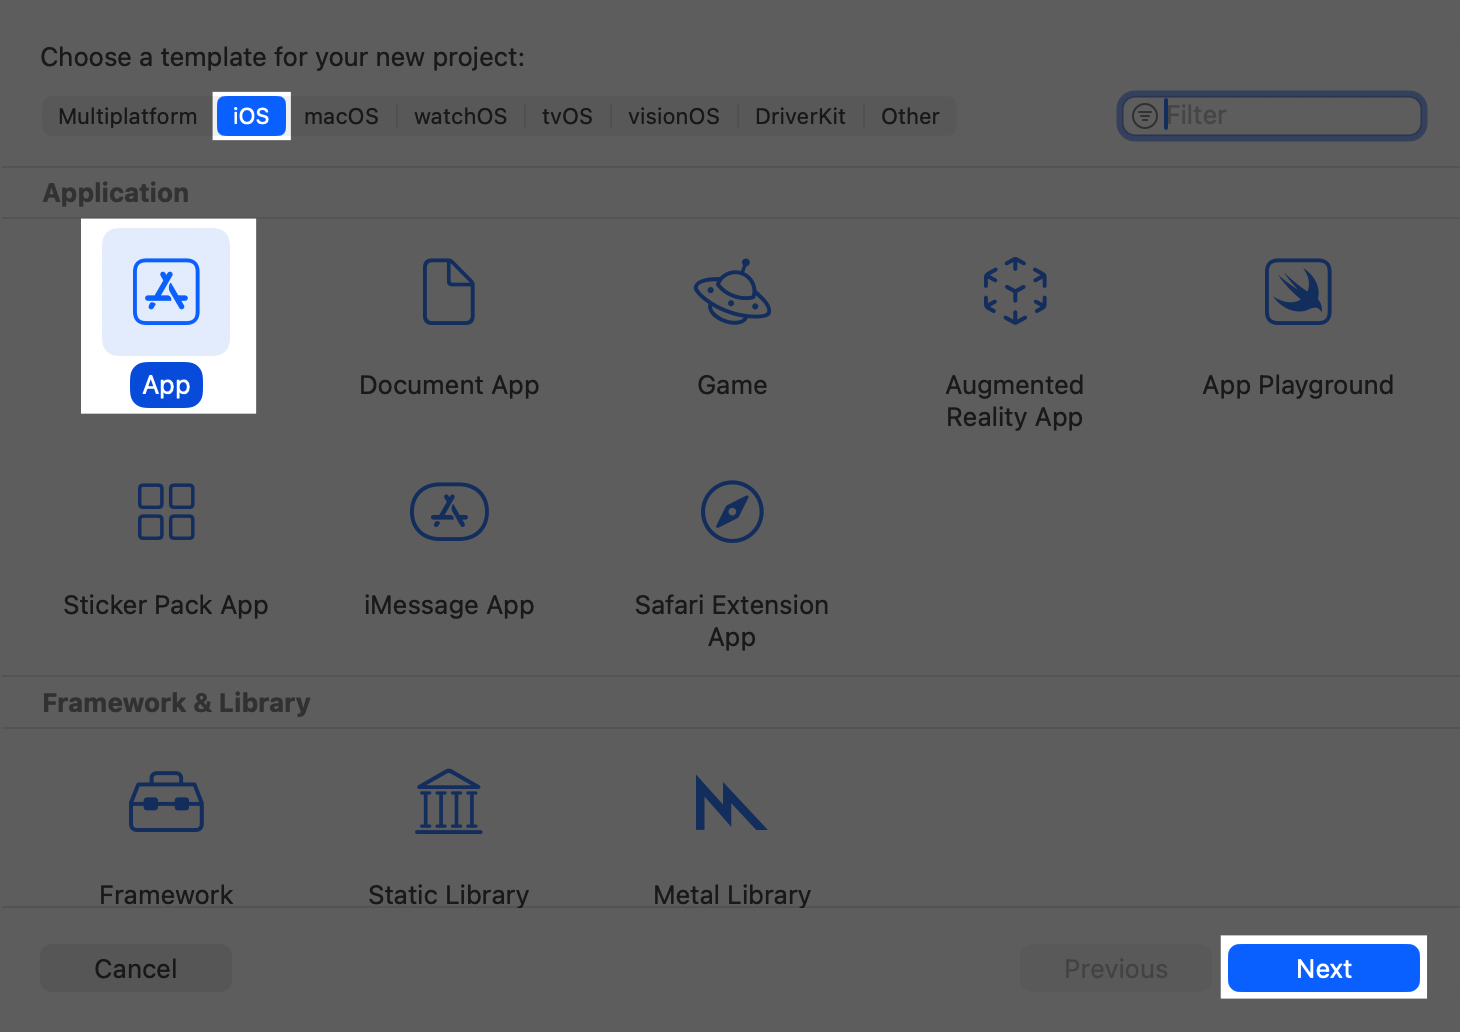
On the welcome screen choose Create New Project. If your version shows a New Project menu, choose App. In the template picker choose iOS, then App, and continue.
- 2In Xcode
Choose the starting options
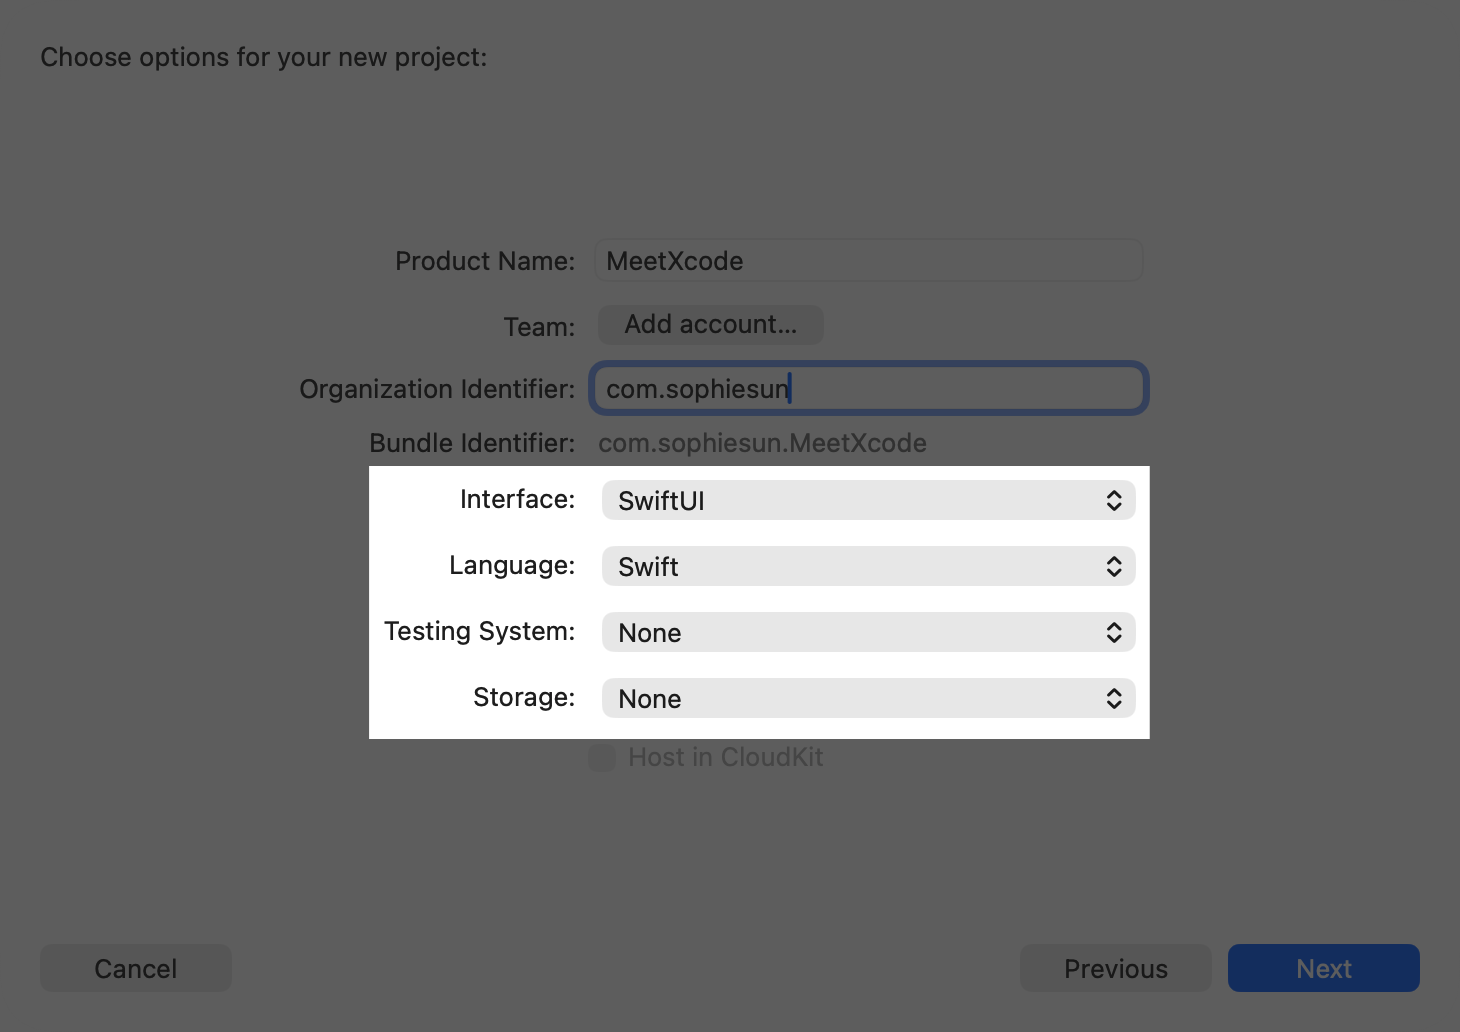
Use a short version of your app name for Product Name. Choose SwiftUI for the interface and Swift for the language if those fields are shown. Start with no storage; Codex will add it in the saving lesson. Leave the team empty if you are only running the simulator.
- 3In Xcode
Give the app its own identifier
Use an Organisation Identifier based on your own name, such as com.yourname. Xcode combines it with the product name to create a Bundle Identifier. This is an ID for the app, not a website you must buy. Use your own value, not Apple’s sample.
- 4In Xcode
Save it somewhere easy to find
Create a local folder for your apps, then save the project inside it. Note the exact folder name. If Xcode offers to create a Git repository, leave that selected: it can keep checkpoints. You do not need a GitHub account to start.
 View larger
 View larger
A message for Codex
I have created a native iPhone project for my first iPhone app in Xcode. Once I open its folder in Codex, inspect the existing project and explain which file starts the app and which file shows the first screen. Keep the existing project. Do not create another project or add an online service.
What you should see
Xcode shows a project window and a starter screen. In Finder, you can locate its folder and the file whose name ends in .xcodeproj.
A couple of words, explained
- Project
- A folder of files and settings that belong to one app.
- Bundle Identifier
- The unique label Apple uses to recognise your app.
If you get stuck
Checked 7 September 2026. Screens can change; the official guides below have the latest steps.
Create an iPhone project