Prepare and upload a build
A build is a packaged copy of your app. Uploading one puts it in your private App Store Connect account; it does not publish it to the App Store.
Upload a working build and wait for Apple to finish processing it.
If you added iCloud, finish its production setup first. If you added accounts, keep the real service running and complete the access tests.
Archiving, uploading and Apple’s processing can take several minutes or longer.
Let’s do this
- 1In Xcode
Check the release copy
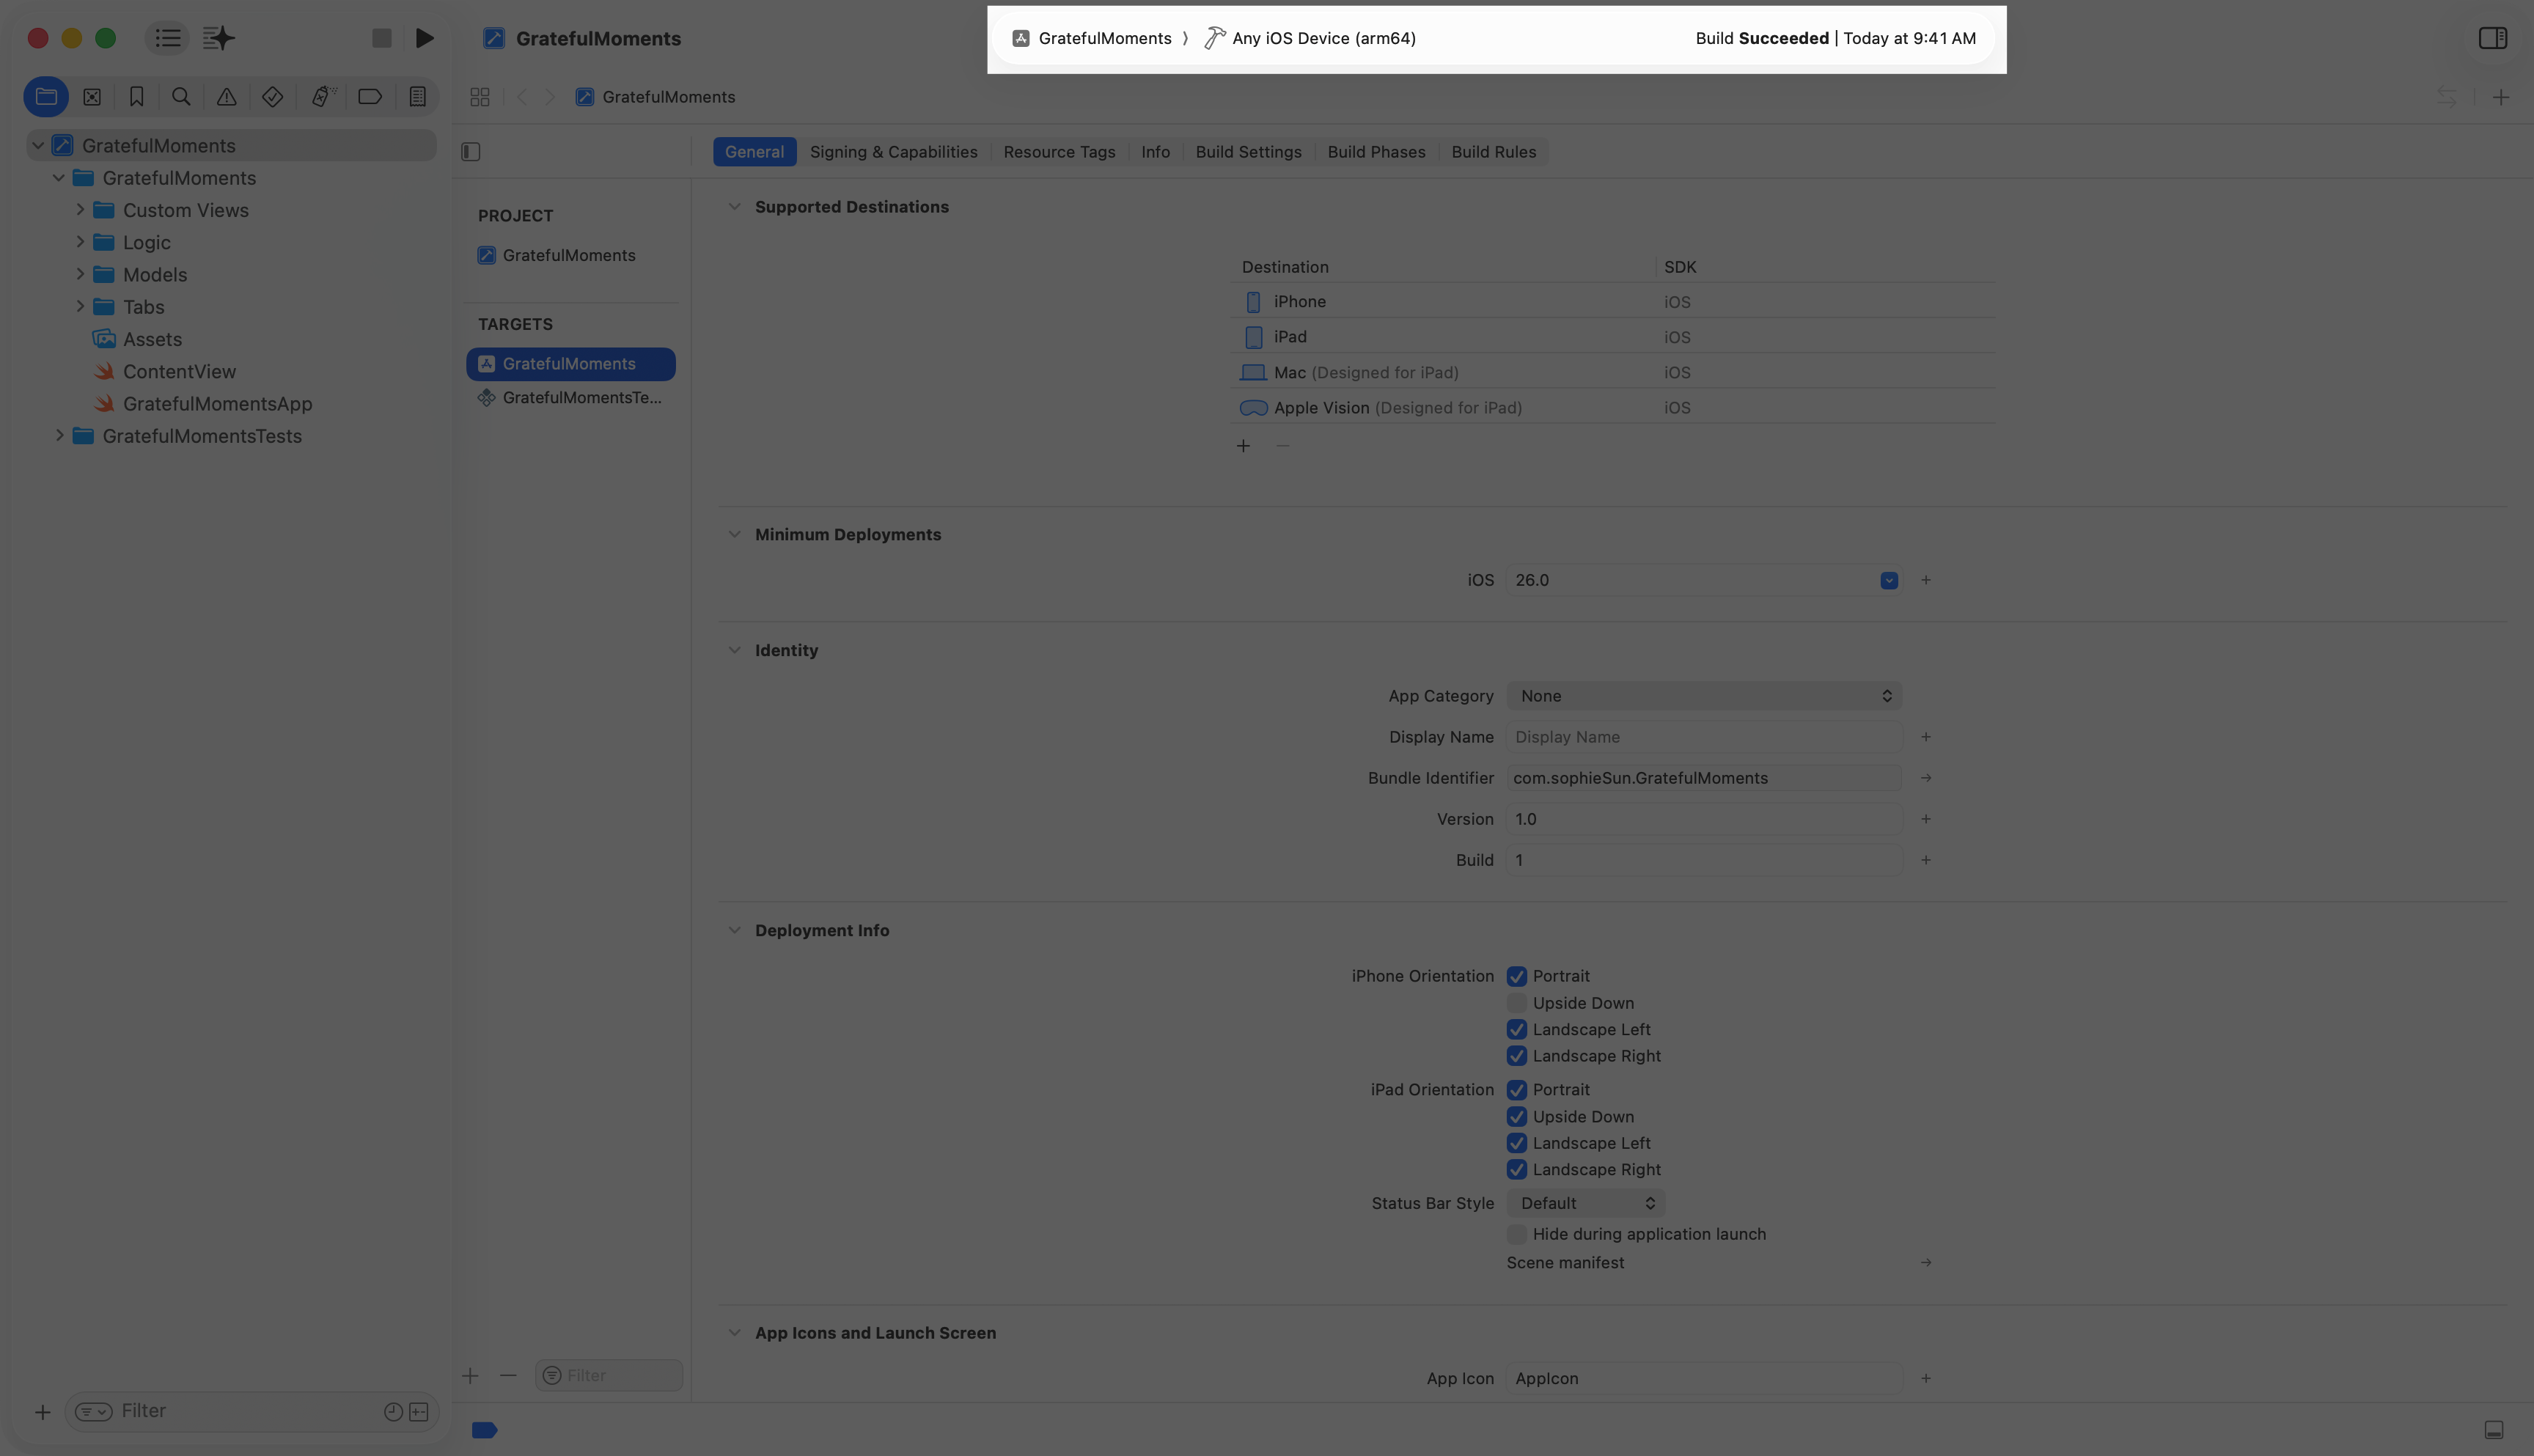
Run the test checklist. Select the app target → General and set a version such as 1.0 and a build number such as 1. Check the app icon, supported devices and minimum iOS version. Under Signing & Capabilities choose the enrolled team and the Bundle ID used in App Store Connect.
- 2In Xcode
Create an archive
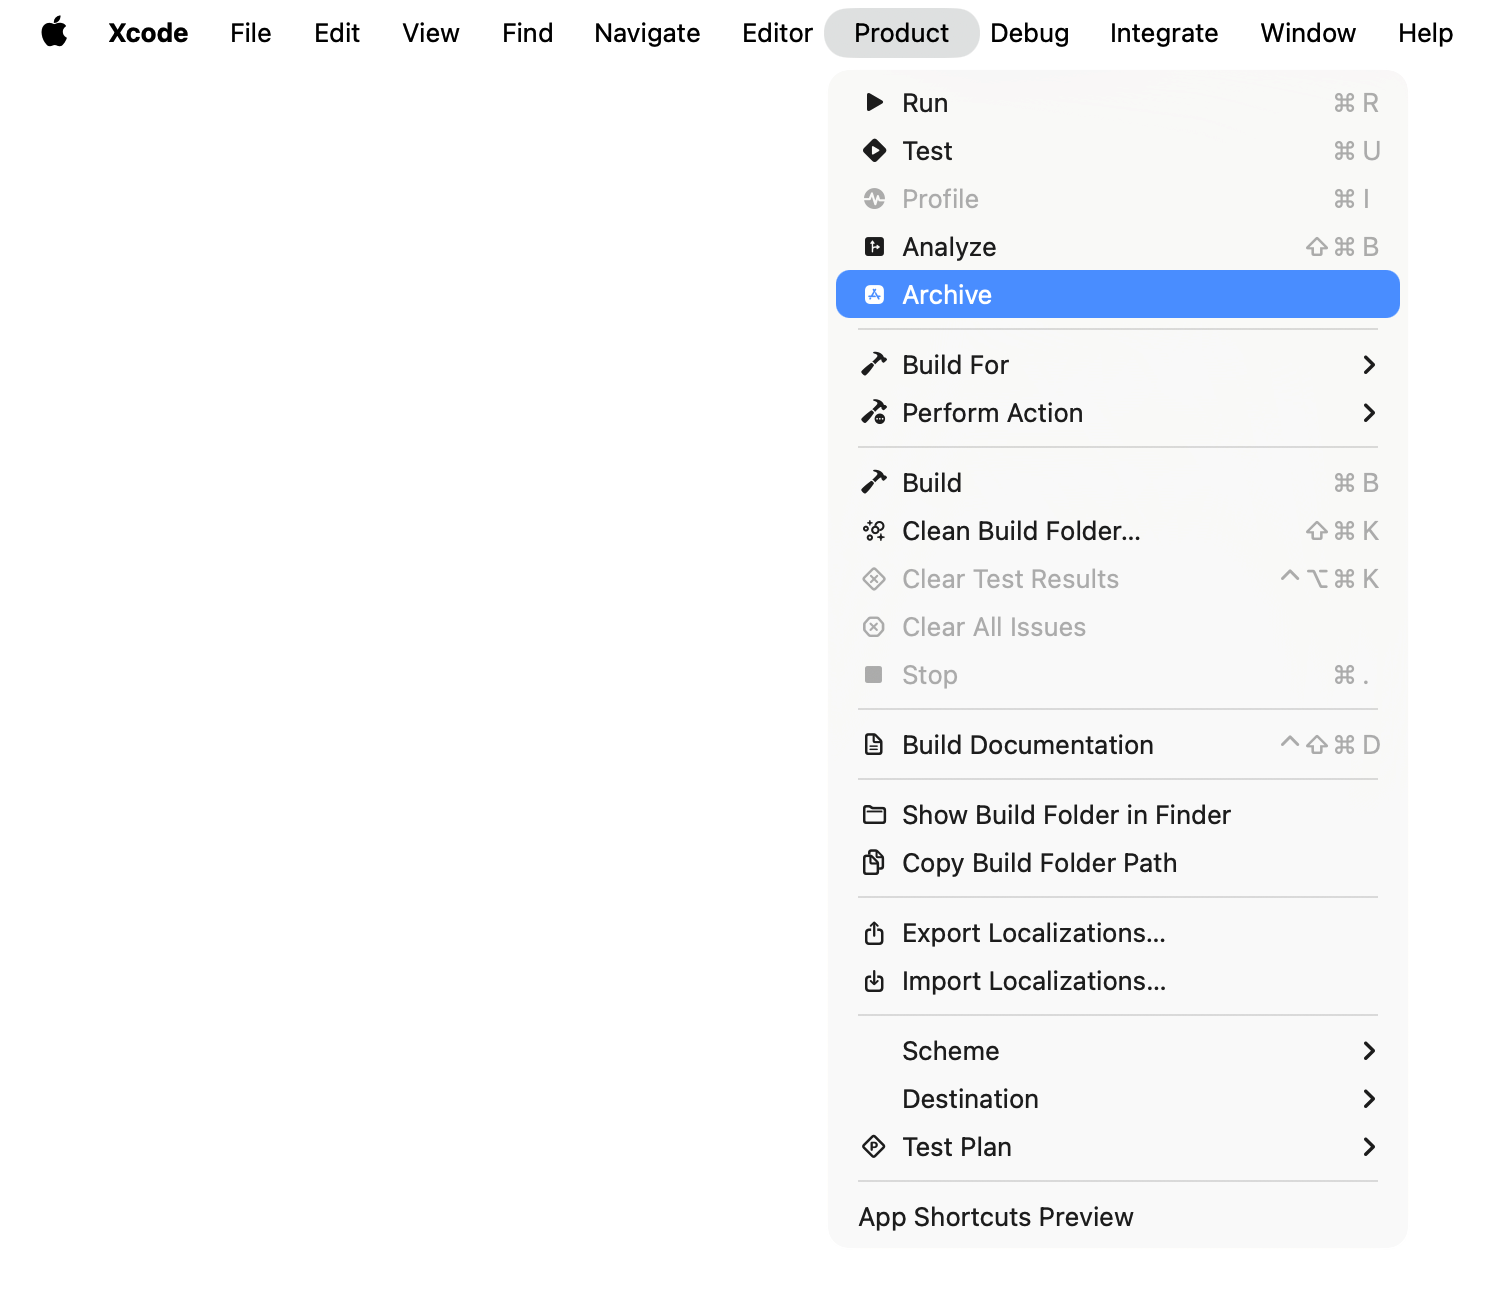
In the run destination menu choose a generic iOS device option, such as Any iOS Device (arm64), rather than a simulator. Choose Product → Archive. An archive is the saved package Xcode prepares for distribution.
- 3In Xcode
Send it to App Store Connect
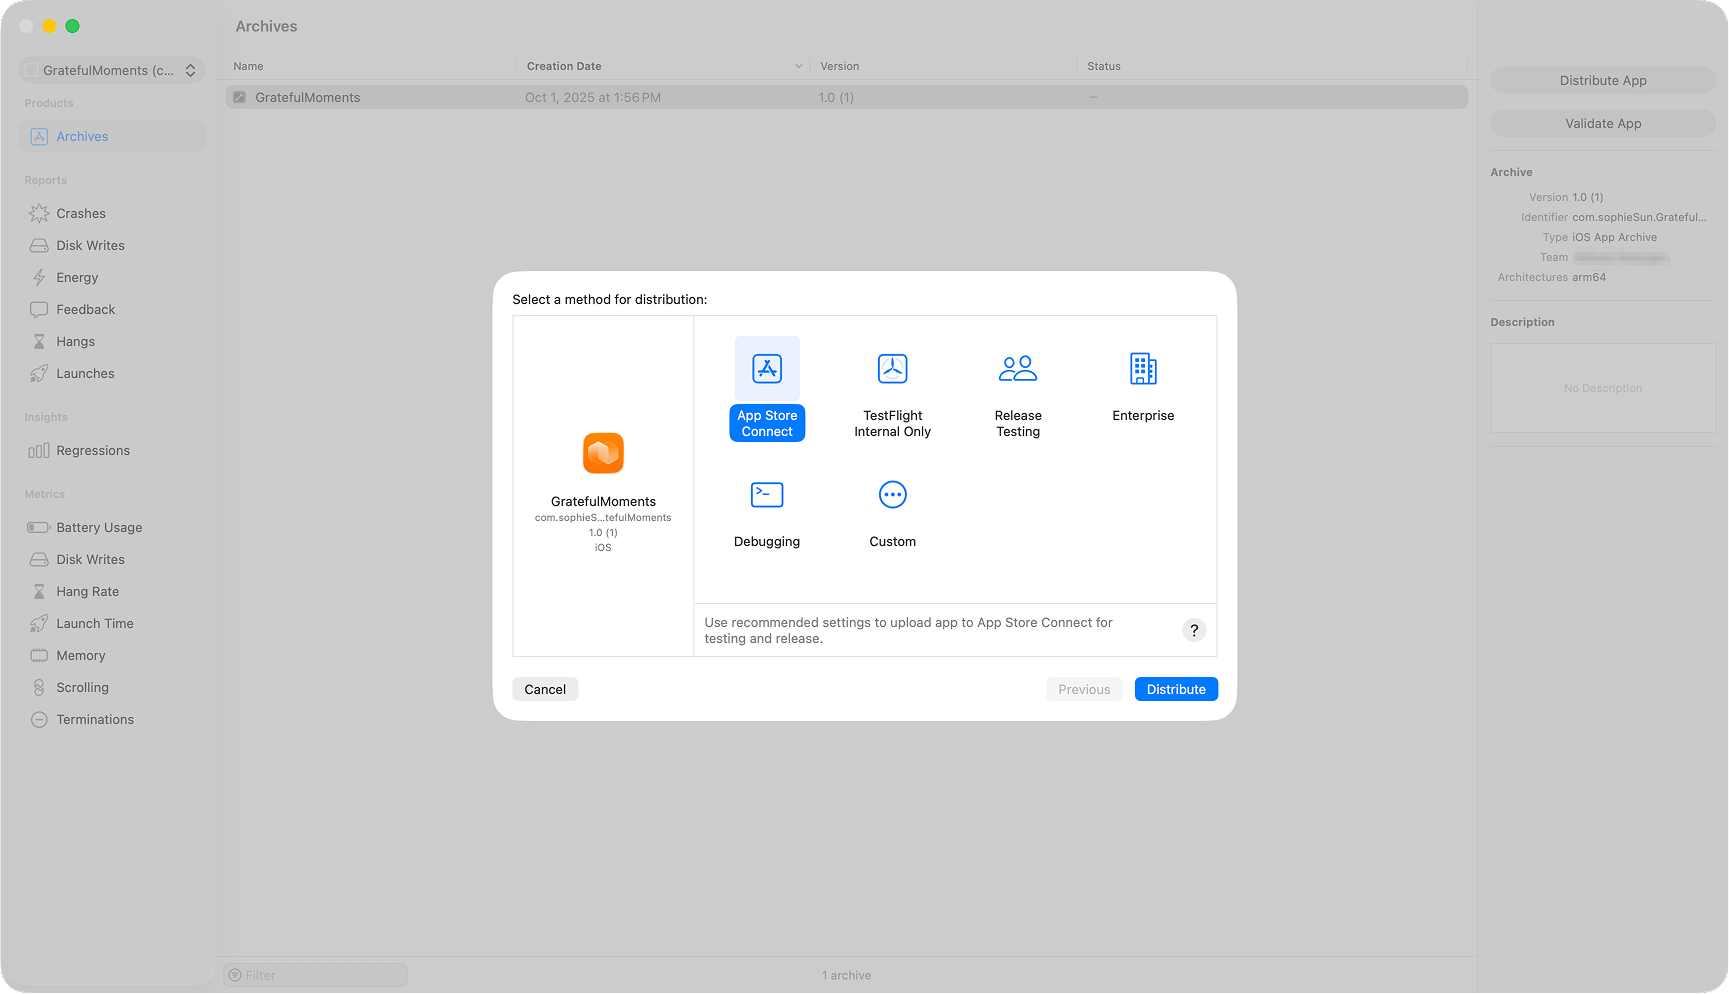
When Organizer opens, select the new archive → Distribute App → App Store Connect. Follow the upload steps with automatic signing. Read any validation messages and fix them before retrying.
- 4On your Mac
Check the processed build
Open your app in App Store Connect → TestFlight. Wait for processing. If Apple asks export-compliance questions, use the encryption guidance and the actual app’s behaviour. Resolve missing compliance before inviting testers.
 View larger
 View larger
 View larger
A message for Codex
Prepare my first iPhone app for its first TestFlight upload. Check release build errors, app icon, version and build number, signing, Bundle ID, test configuration, privacy requirements and any network services. Report problems and explain fixes before changing settings. Do not upload or submit it for me.
What you should see
The build appears under TestFlight and finishes processing without an unresolved error.
A couple of words, explained
- Archive
- The finished, packaged copy of your app that Xcode prepares to send to Apple.
- Version
- The number people see, such as 1.0. You change it when you release something new.
- Build number
- A count of each upload, such as 1, then 2. It has to go up every single time, even for a small fix.
If you get stuck
Checked 7 September 2026. Screens can change; the official guides below have the latest steps.
Upload a beta appApple’s encryption questionsUpcoming submission requirements